Spring 2023 Intro to Glasspainting workshops

These are creative retreats for beginners and artists in any media, not just stained glass lovers. Here are photos from the retreat I hosted here at my studio in November 2022.

I have a few places still available in my 5-day residential Intro to Glasspainting workshops beginning April 24 and May 8. No experience needed. Only 4 students per workshop.

I taught glasspainting to glass scientists from Corning and elsewhere as part of the United Nations International Year of Glass initiative. It was such a good experience all round, for both artists and scientists.

Please share this message with anyone who might be interested. They can find out more by clicking the Workshops tab on the navigation bar at coombscriddle.com Everything is online, including a video of the accommodations and links to scholarships. Tuition is $860 for the 5-day workshop.

Scholarships available for my September 2021 workshops

If you’re interested in taking a workshop with me there’s still plenty of time to apply for a scholarship from the American Glass Guild.  Their deadline is August 30th 2021. You will need to select a workshop (with me or another stained glass instructor) as part of your application. Those who have already signed up for one of my September 2021 workshops are eligible to apply. International applicants are also welcome. Here’s my schedule of Fall 2021 stained glass workshops for beginners, stained glass professionals and artists in any media who might wish to attend. And here’s the direct link to an online application for the American Glass Guild’s James C. Whitney scholarships for 2021.

It was once feared that stained glass would become ‘a lost art’ but the tide has turned in recent years. Thank goodness! Younger artists are taking an interest, many with the support of two US organizations that work tirelessly to keep stained glass alive and thriving.

The Stained Glass Association of America (SGAA) is a vital community of stained glass artists, artisans and aficionados of stained glass. The American Glass Guild (AGG) is a nationwide group of equally dedicated independent artists and professionals. Both organizations encourage and promote the creation of new work and the conservation of stained glass. Both have also, for 13 years now, generously supported my workshops with tuition scholarships. Please support them if you can.

Donate to the American Guild Guild

Donate to the Stained Glass Association of America

If you have questions please send me a message via my website. I spend long days in my studio and often forget all about my social media.

You may also explore my blog for hundreds of photos and articles about stained glass; watch short video clips of me glasspainting and discussing stained glass design; enjoy a 13 minute video of my entire process and learn more about me by listening to this 56 minute interview with Shawn Waggonner from her podcast Talking Our Your Glass.

How to paint stained glass; Stained glass design & painting workshop with Debora Coombs in session

Fall 2021 Stained Glass Workshops

Hurrah! We are beginning to lift our Covid-19 restrictions in Vermont. So if you’ve been waiting to take a design or glasspainting workshop with me you may. At last!

Hands-on, in-person, 5-day stained glass workshops will start September 20th 2021.

Right before the pandemic I created a new curriculum, a series of three stand-alone 5-day workshops. Maximum 6 people per workshop. Suitable for all skill levels with plenty of one-on-one tuition and playful group exercises to counteract any self-doubt or artistic insecurity.

Here’s the schedule. Workshops begin on September 20th 2021 with an introduction to glasspainting workshop followed by a stained glass design workshop and an advanced glasspainting workshop. Those who want to learn glasspainting and design in a single trip to Vermont may sign up for two or three adjacent workshops.  More information here.

Instruction includes Powerpoint presentations, technical demonstration, hands-on group exercises and individual projects. I teach practical skills and repeatable, step-by-step processes that are difficult to learn online or figure out on your own. You can learn how to mix slow-drying glasspaints to optimum viscosity for hand-writing, simple printmaking, wet scraffito and elegant, fluid brushwork; how to paint faux textures like stone, wood, feathers and fabric; and how to design a painted stained glass window from your own reference material.

Tuition costs $860 for each 5-day workshop and includes lunch and materials. Go to coombscriddle.com for a schedule, workshop descriptions, and general information on location, hours, scholarships, accommodations and more.  If you have questions, shoot me an email. Prefer to chat? Email me your mobile number and we’ll use text to schedule a phone call.

Why do I teach stained glass? In the midst of a glasspainting demo I gave in my last workshop one student said, I just learned more in 5 minutes that I did in 3 years of trying to figure it out on my own! Read this post about craftsmanship. Tip: there are some things that just cannot be learned from YouTube! Having said that, you may indeed watch videos of my beautifully responsive glasspainting mixture in action or read the story of my proprietary glasspainting recipe to get an idea. And if you’re wondering what it’s like here in Vermont, where workshops take place, watch the 11-minute video of me painting a stained glass window in my studio.

Lastly, if you’re curious about what drives me as an artist, listen to this interview about my life’s work in stained glass and how I transitioned to the mathematical work I’ve been doing in recent years. My resume in 57-minutes!  Many thanks to interviewer Shawn Waggonner. She really got me to open up!

A great week!

2013 design & glasspainting workshop in Vermont – such a productive and enjoyable week! Thanks to Linda Zochirack for these photos.

This slideshow requires JavaScript.

The first two days were spent learning design via Powerpoint presentations and hands-on drawing. Working from reference material they’d chosen or brought with them, each student made a cartoon (full-size black & white shaded drawing), a cutline (a working drawing that looks a bit like a dressmakers pattern), and a thumbnail sized watercolour sketch to help with glass selection.

As I keep on saying, successful stained glass is a marriage between art and structure; between colour, line, imagery, and lead. This first part of the workshop is for creative decision-making, for working all this out on paper first. I showed students how to draw a traceline that is a fresh, creative interpretation of their drawing/photo and how to design a panel from separate pieces of glass with leadlines.

Everyone pretty much accomplished this by the cut-off time, 4pm Tuesday, and the evening was spent furiously cutting glass. Since I’m not teaching fabrication I don’t mind if students cannot cut. Either I’ll do it, or another student will help. I’ve taught this workshop many times and it always seems to work out OK, everyone has a panel ready by the end of the day.

The rest of the week was spent painting glass. On Weds, specific instruction on mixing, slaking, thinning and applying glasspaint with a whole variety of tools and techniques, plus group exercises and demos. On Thursday, Friday and Saturday, students worked on their own projects. Scroll through the folder to see what was accomplished. A successful six days’ work all round!

As requested, I have updated my Resources page with info about tools, materials and suppliers. There’s also a link to my Notes for Students. More? Watch glass painting demos in real time on my Vimeo page and the whole process of making a stained glass panel in these two video shorts Menfolk Part 1 (6 mins) and Menfolk Part 2 (8 mins). Enjoy!

Pics and a video from Arrowmont

Last week’s Arrowmont workshop included slide presentations, design seminars, instructions on mixing, thinning and applying glasspaints and several painting demos.  You can also watch a brief (2.5 minute) video of me painting basket weave with my fingers and printing with plants. Enjoy!

This slideshow requires JavaScript.

This next slideshow shares some of the work completed by students last week. All photos by either Ginger Ferrell or Laura Goff Parham. Thanks both!

This slideshow requires JavaScript.

I just have to end with this picture, taken behind my back (ha ha) by my long-suffering Teaching Assistant, Ginger Ferrell. Thanks Ginger for minding the kilns and taking some lovely photos.

early morning yoga

early morning yoga

I had a really great week at Arrowmont. My mornings started at 7am with yoga on the screened porch with Jean Campbell, one of the nine other instructors.

I got a real buzz from being in such an intensely creative community – the staff, faculty and students at Arrowmont. I came home energized with creative batteries recharged. I’ve already started planning my next series of stained glass exhibition panels and looking for somewhere to exhibit new work in the spring.

There are classes scheduled at Arrowmont right up until the end of October.

class photo

class photo

Watch me painting roses!

Moving ahead on the amateur video front: Painting rugosa roses in real time.

Since I do not know how to edit my movie I’m posting still photos too, starting with a camera’s eye view of my work space with cartoon in the background (full-size drawing) and dozens of pieces of partially painted glass on the light table.

IMG_2568

IMG_2565
If I switch the overhead light on and turn off the light table you can see my tools, paint and transparent-bottomed tray full of glass. Notice also the real rose, plucked from my garden this afternoon, in a vase beside my glasspaint.

Next, the video….

I am adding a second layer of paint to create a soft texture and some modeling to the roses. This layer goes on top of the first layer of sumi-esque, calligraphic painting (the tracelines), painted and fired a few weeks back.

IMG_2571

Notice that the roses on the right have only tracelines (the Fred Flintstone phase). The roses on the left have a second layer as well.

The thimbleberry flowers can also be seen at both stages, with tracelines only on the spray at the bottom and two layers of paint on the upper spray of flowers. These will become much, much brighter before they go in the kiln though. I will brush back (remove) the unfired glasspaint to reveal highlights on the petals.

In the last photo you can see the second layer of glasspainting in detail. The larger piece of pink glass I just painted on the video is right in the middle.

IMG_2570

Mary to the hair salon, Joseph gets a facelift!

family2517

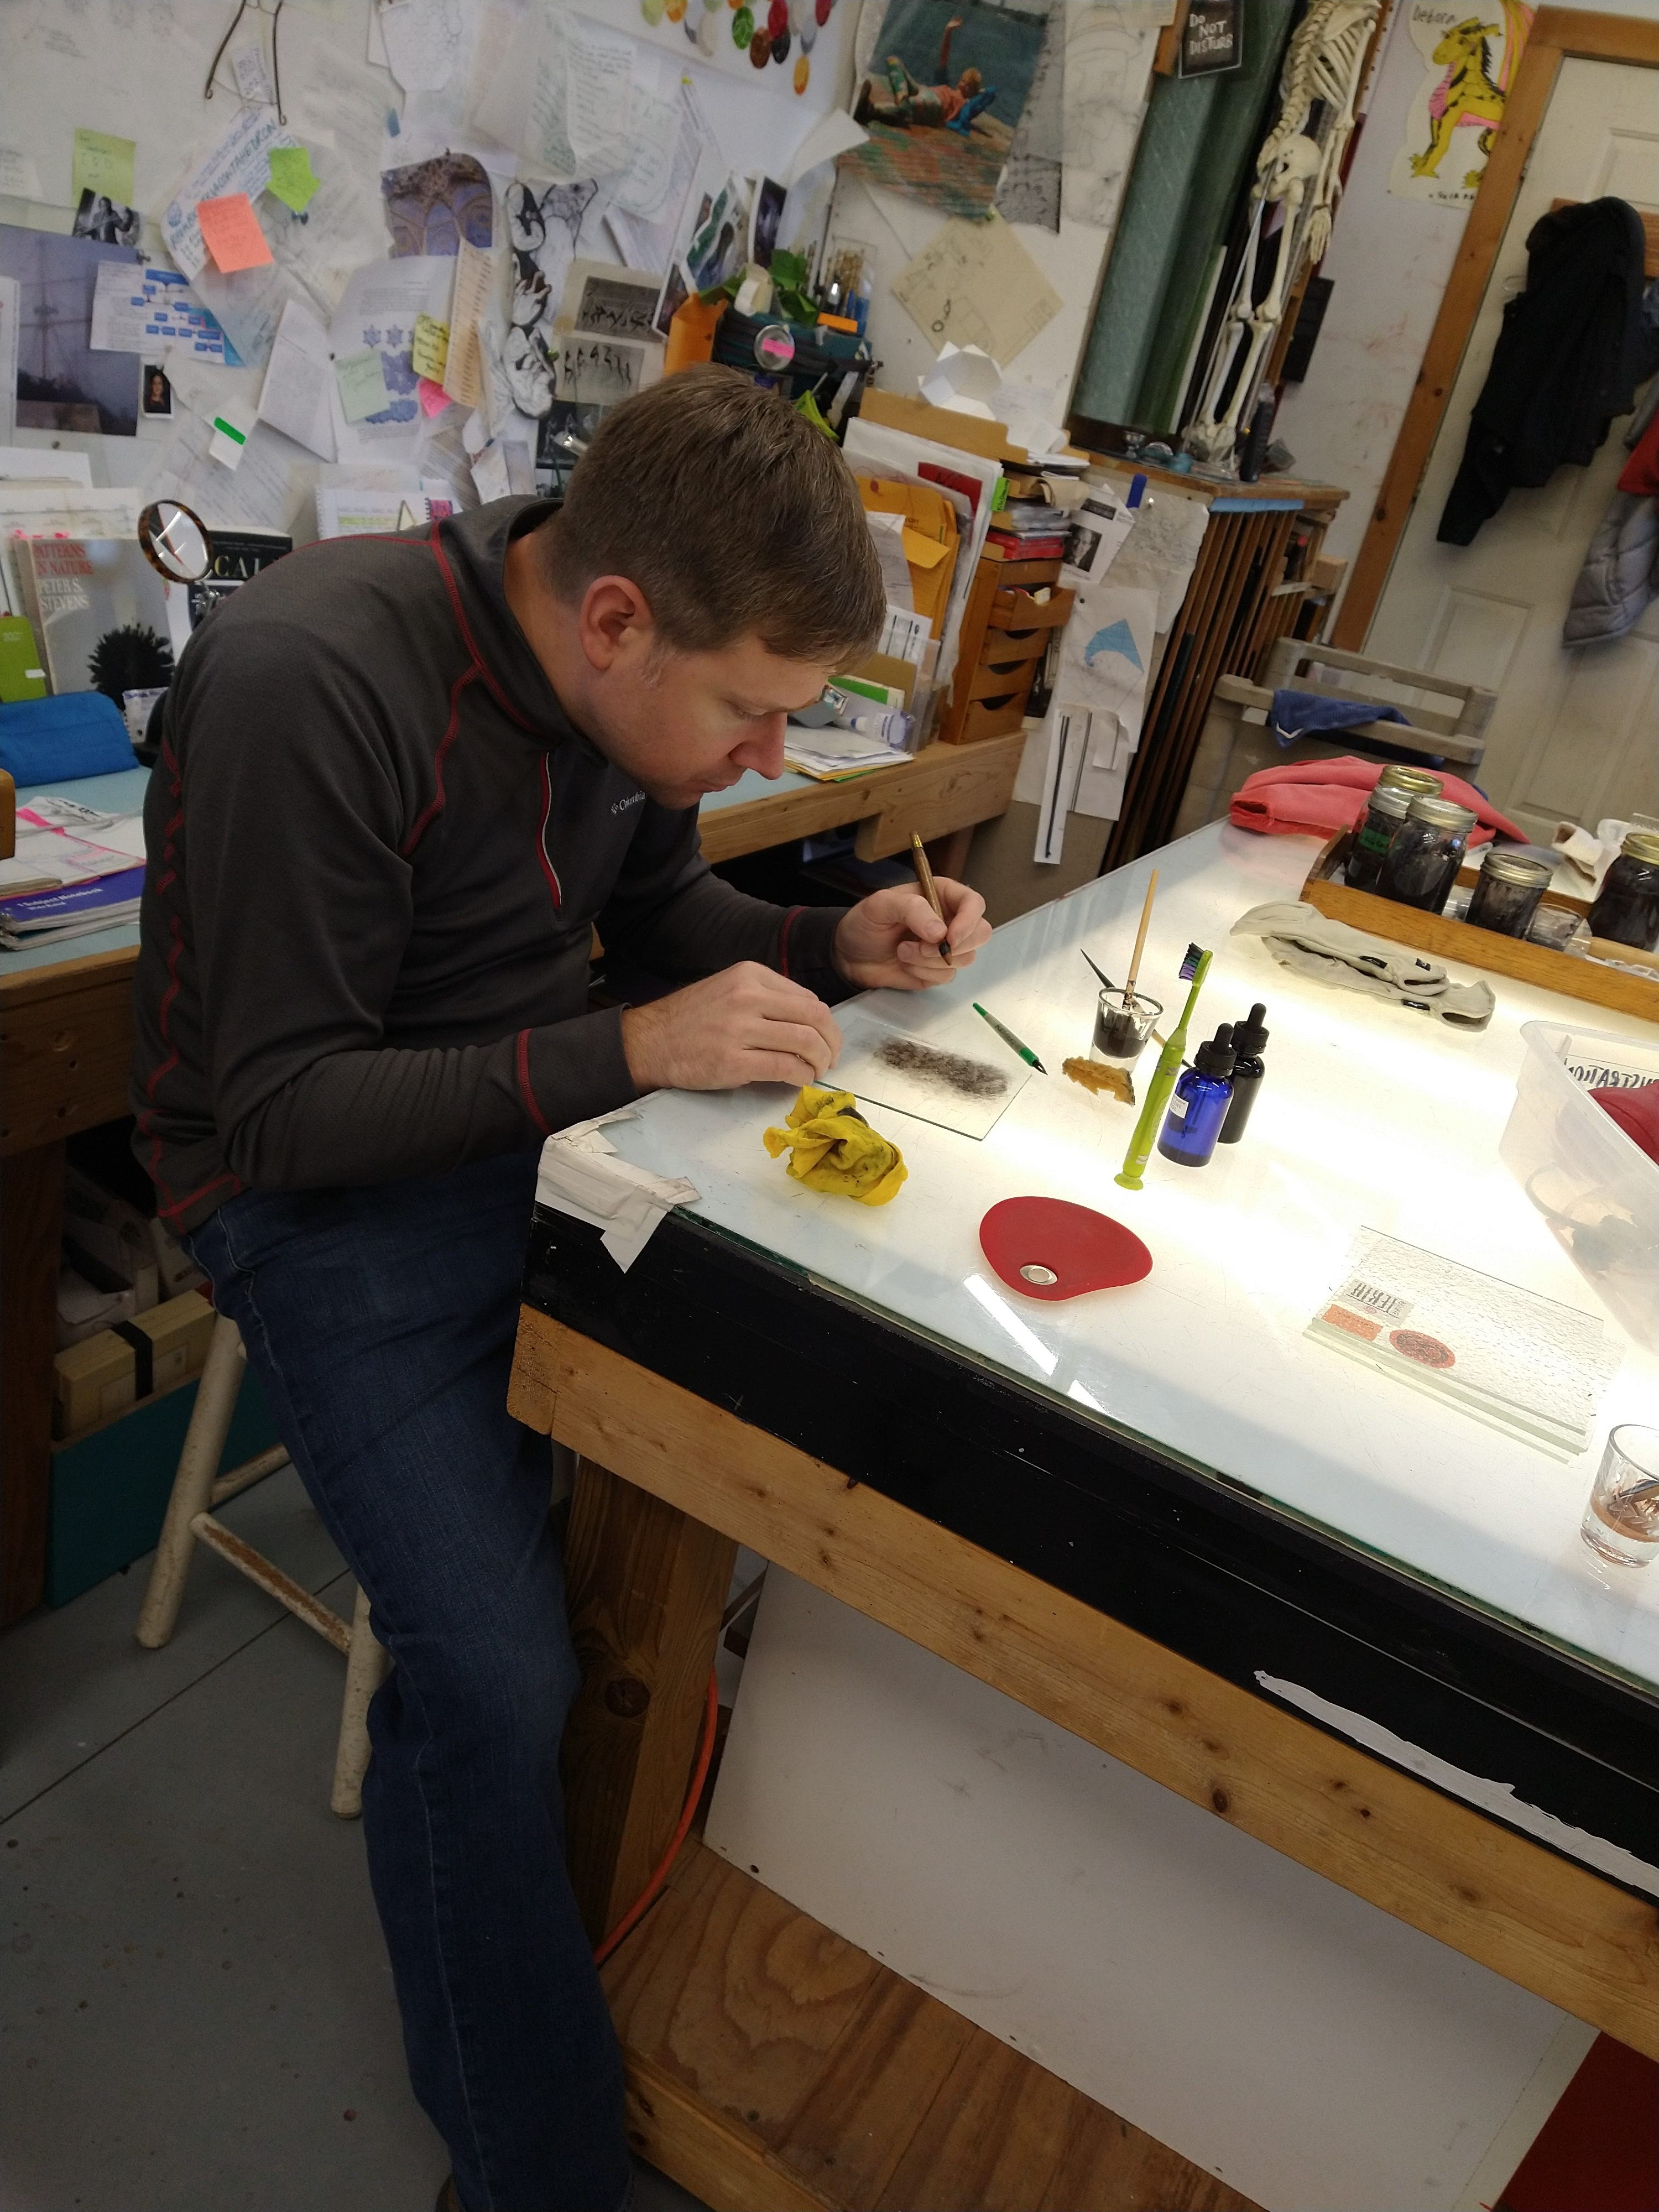
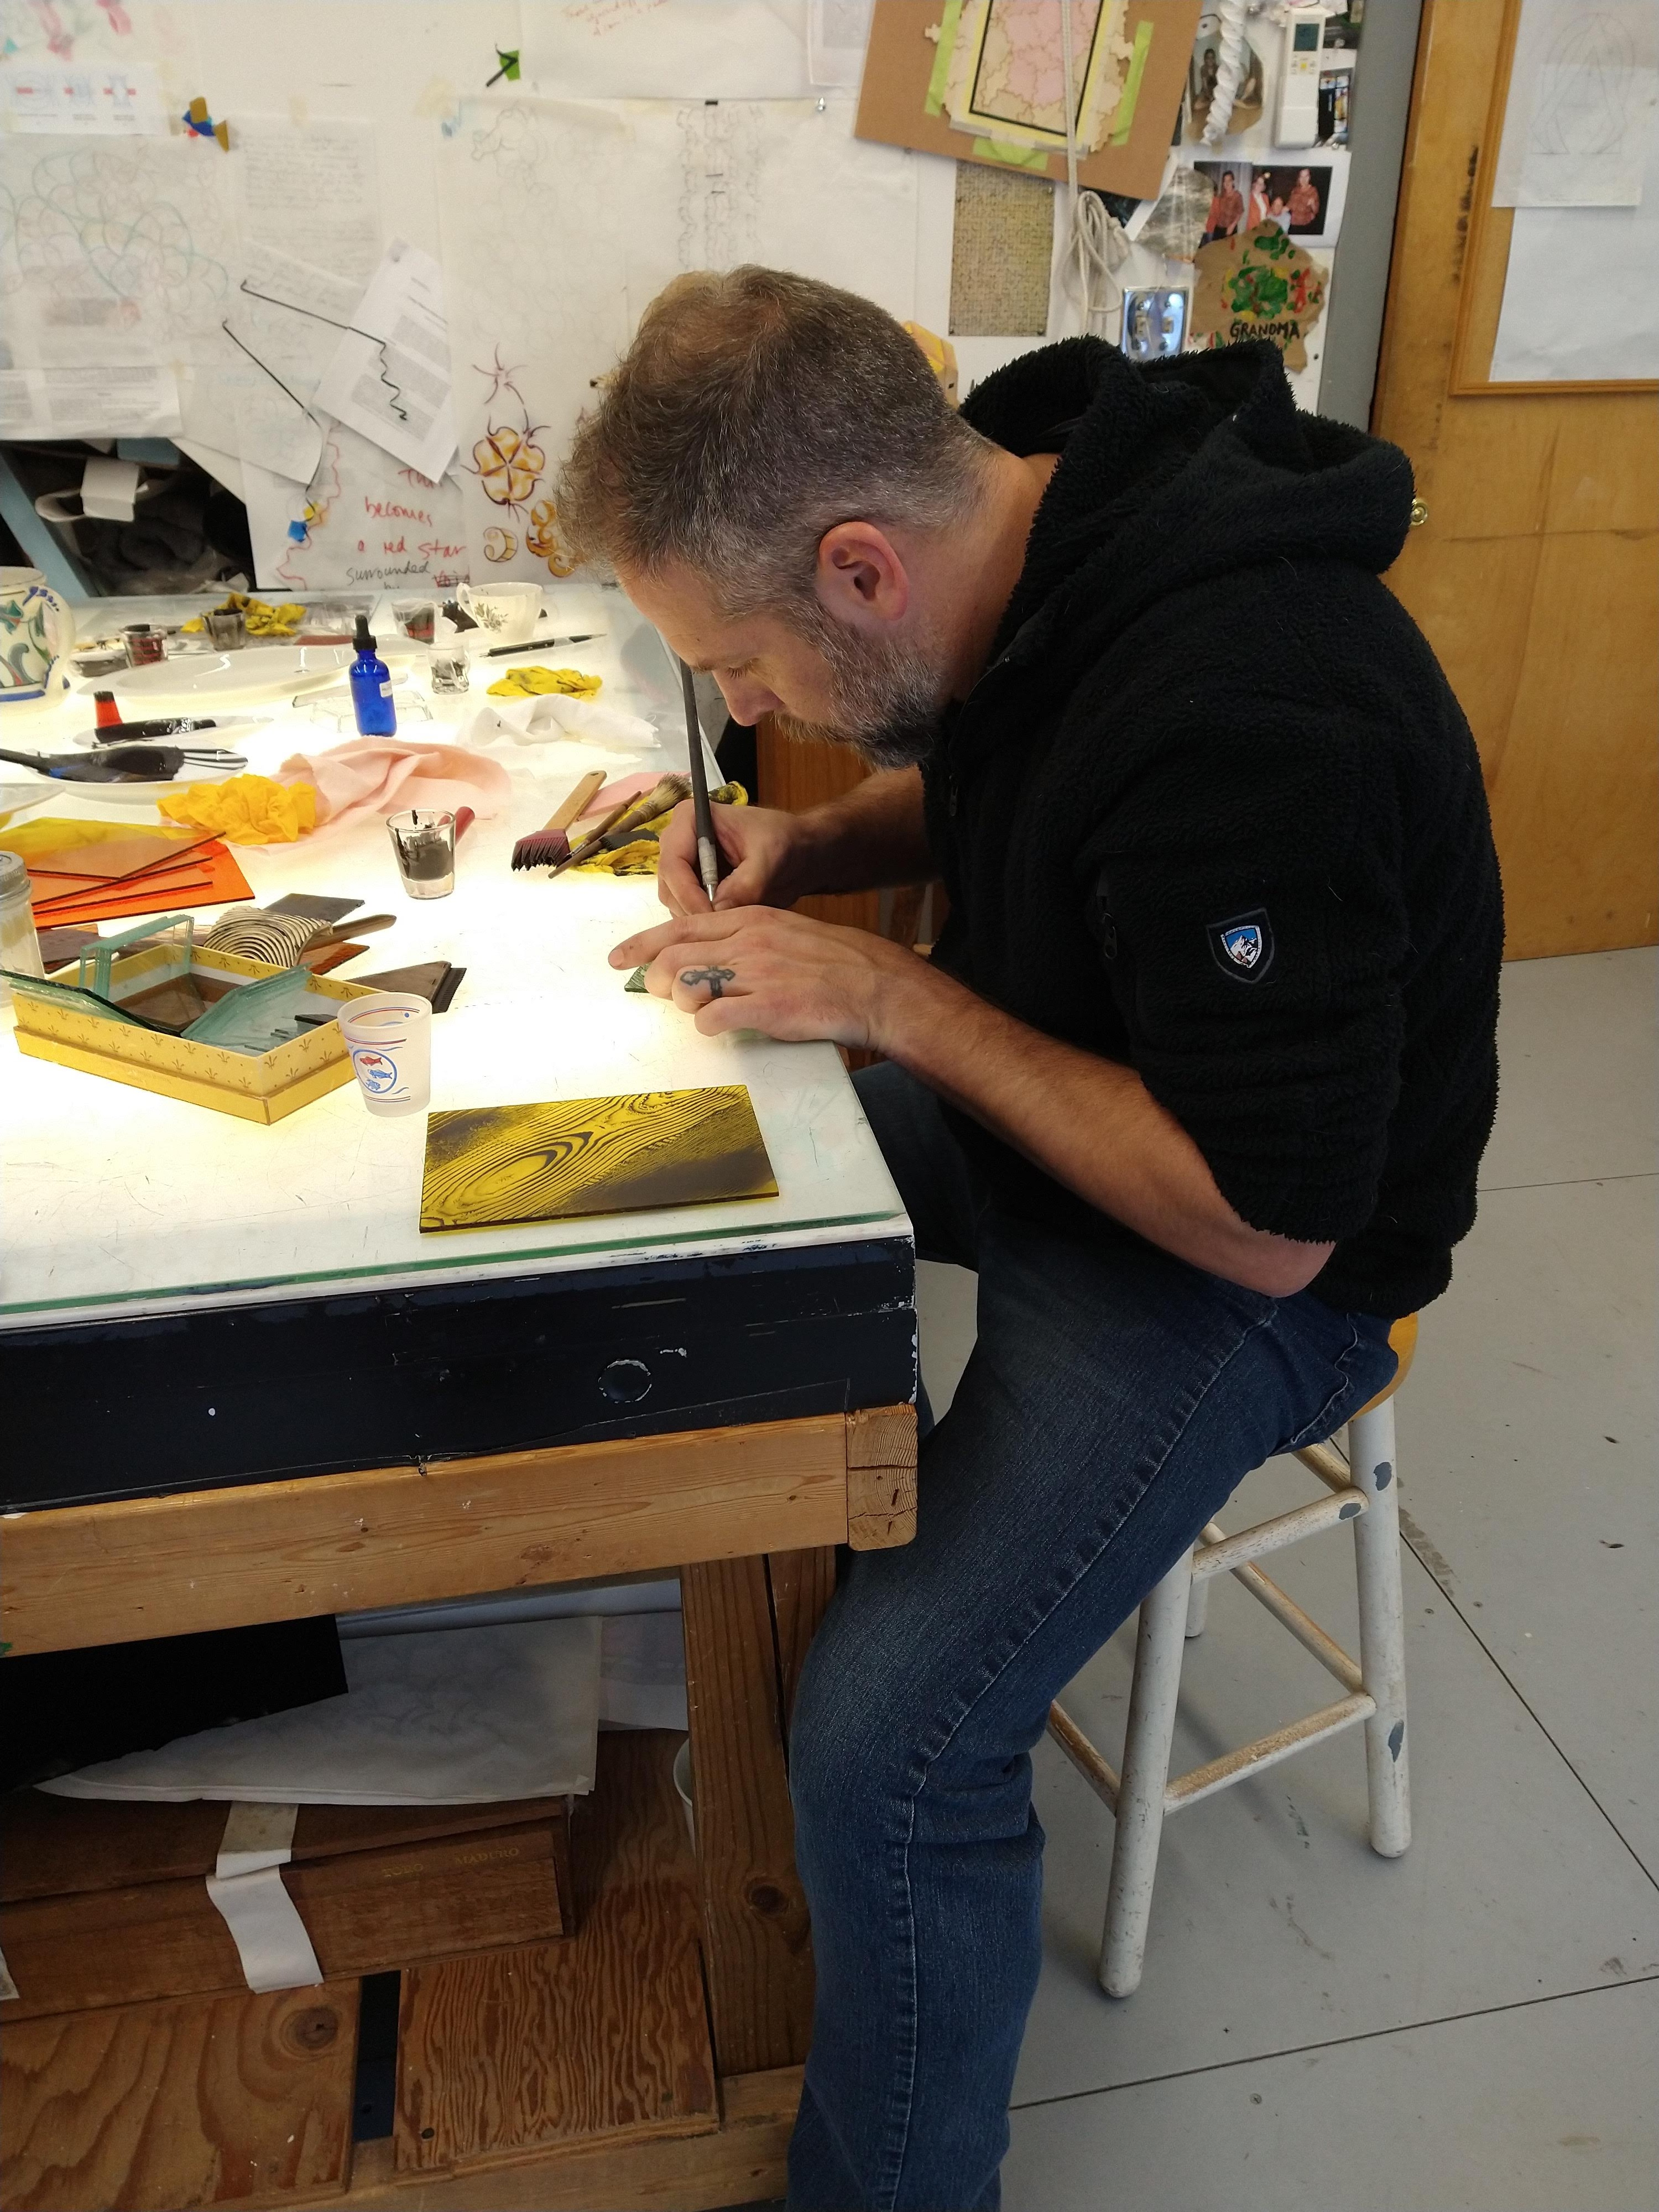
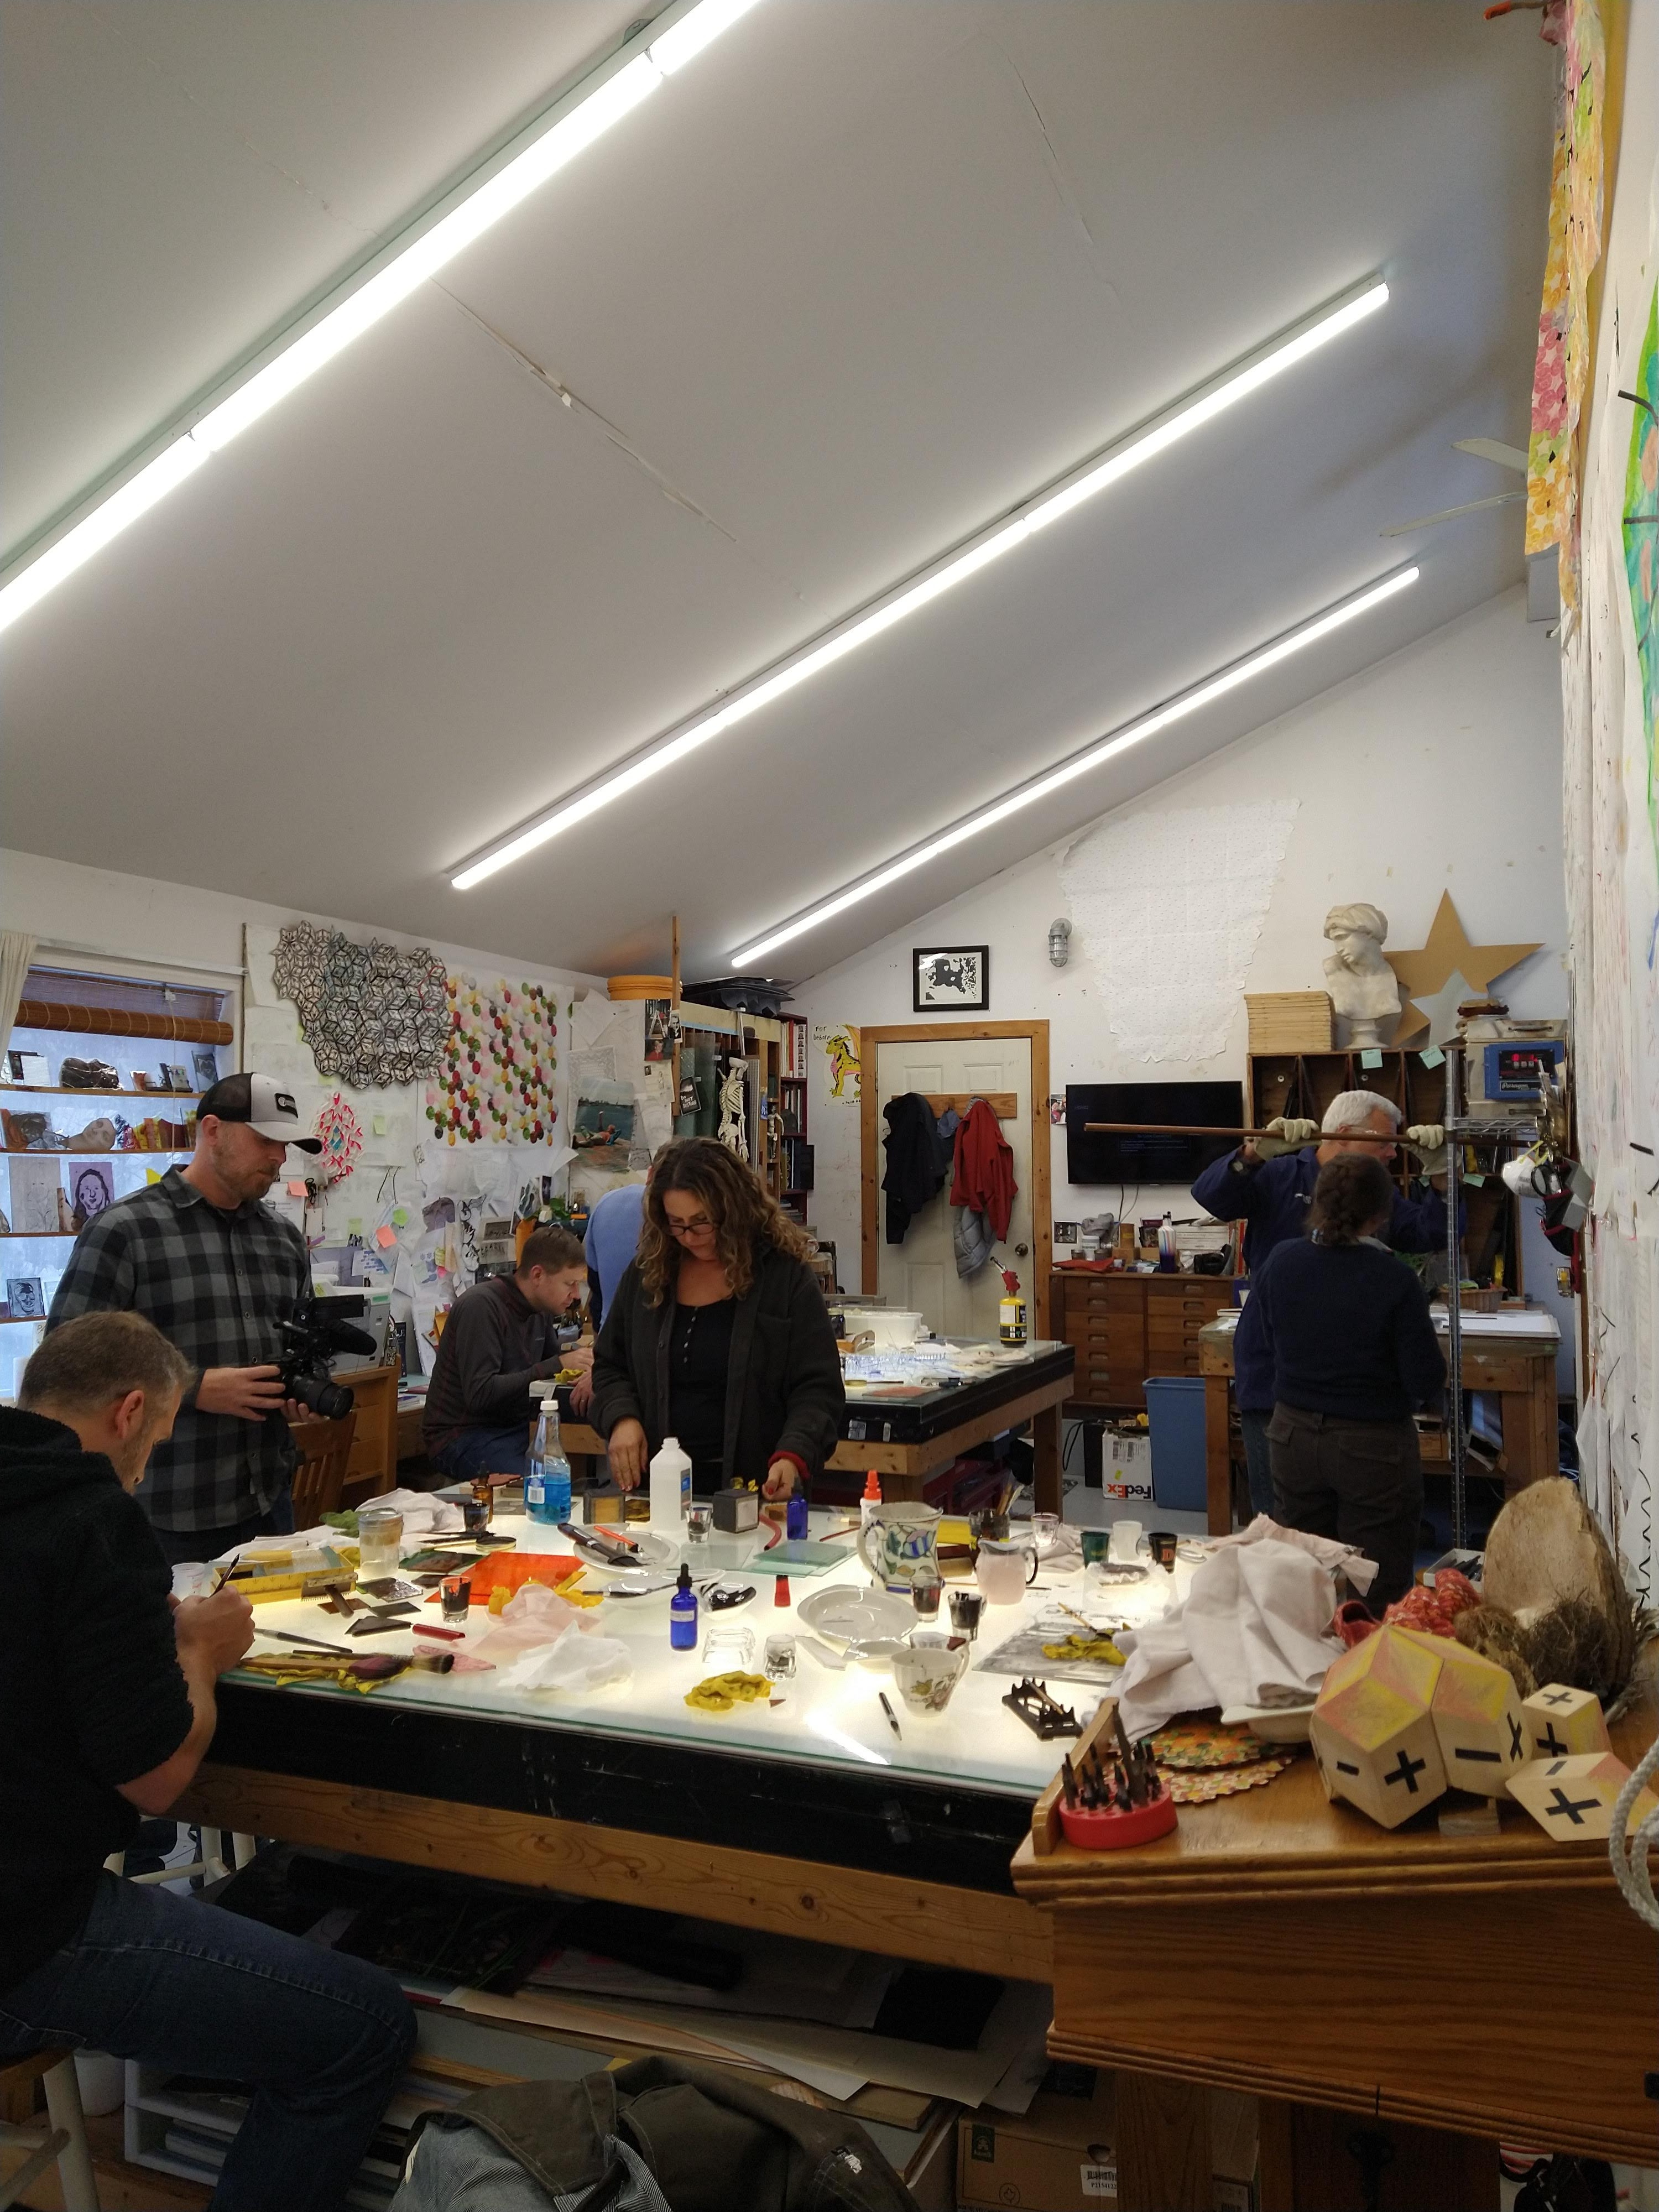
The window is still 1,200 little pieces of painted glass lying on transparent bottomed trays on my light tables. It is progressing slowly and surely toward completion. My current work consists of a lot of running up and down stairs to the loft area of my studio to review my glasspainting from a distance.

photo(loft)

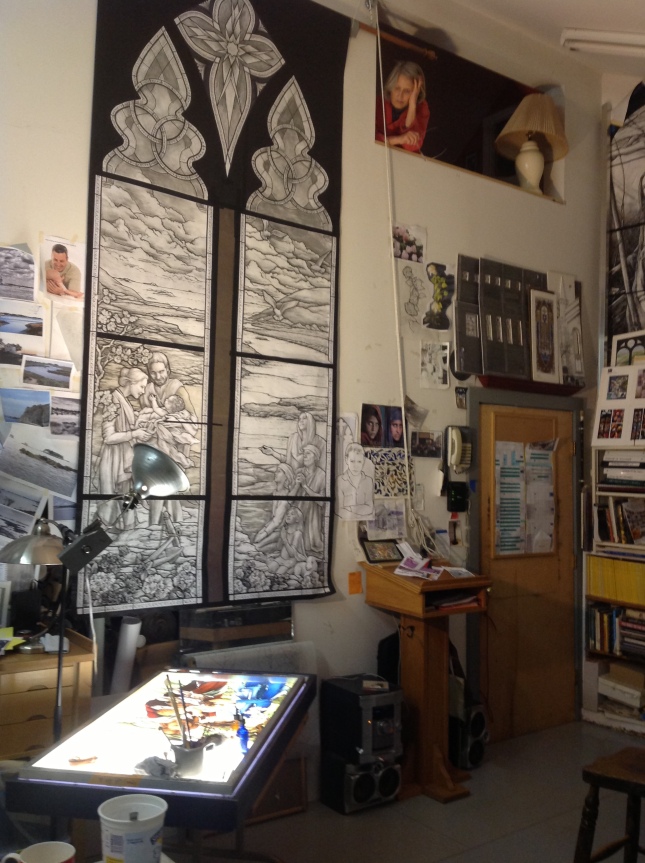
Looking down at the work from above is crucial for assessing how well the modeling is working. It also mimics a viewing angle from the inside the church.

Stained glass people of old used all sorts of tricks to do this. Looking through the wrong end of opera glasses, crucially placed mirrors, standing on a stepladder…. The camera (or even your cell phone) helps a lot too, especially if you view your work at different times of day and in different lighting conditions.

photo(lightbox5)


Here’s Joseph during a facelift, and some of the steps it took to get him there.
1) the glass was masked and sandblasted to create a white area for his undershirt, then firepolished in the kiln.
2) I painted his features as a black line drawing (the ‘traceline’).
3) textured his hair and beard.
4) covered the entire piece of glass with a thin layer of smooth even brown glasspaint (the ‘matte’) and stippled it while wet to create a manly texture (!).

Now, here’s the ‘facelift’!
5a) in the first photo I’ve started to remove the matte to create highlights in his hair and brighten one side of his face.
5b) in the second photo, an hour or so later, you can see the form of his face beginning to emerge.
6) in the third photo I’ve textured Joseph’s undershirt and popped him back in place for a review. Another run upstairs to the loft!

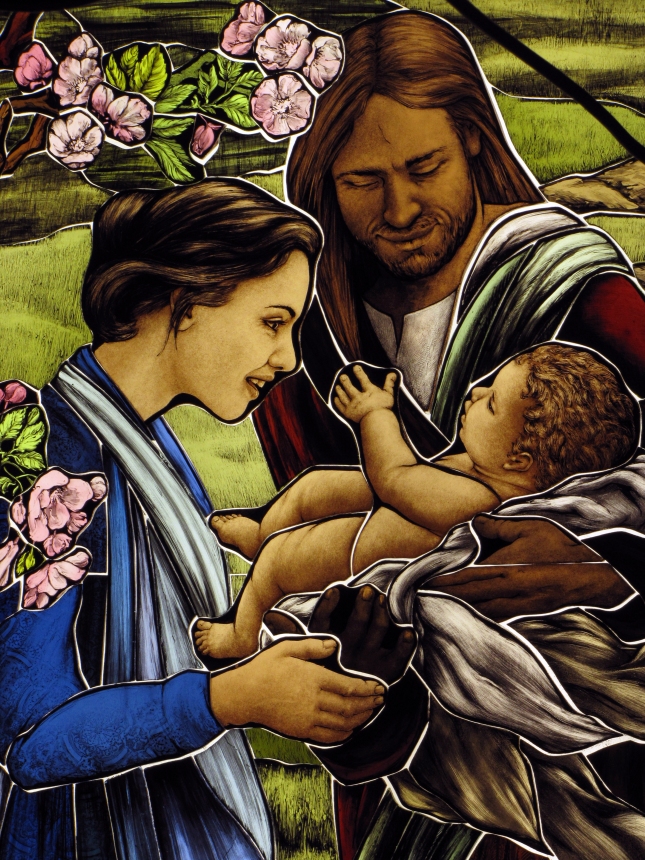
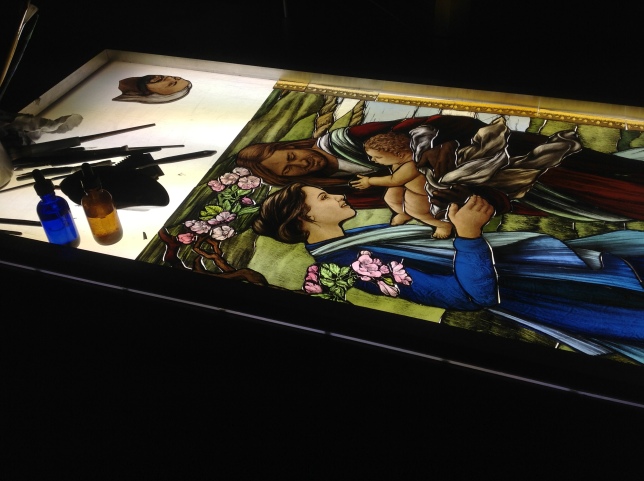
Now, check out Mary before and after her visit to the hair salon.

Note a couple of areas where I’ve laid on mattes and not yet removed them. On the left, Mary’s stole is still dark. On the right, I’ve brushed it back to create highlights.

In the left photo, baby’s blanket has been textured and lightly matted . In the right it’s dark where I have laid on the matte and picked out just a few of the brightest areas. There’s a lot more to be removed (more brightness to be revealed). This is the classic ‘painting with light’ of stained glass.

Visually, the blanket will create a bright starry area around Jesus, the focus of the overall composition. When I’ve finished, the white and pale amber glass will be sparkly once again.

These are the same glasses used in the nativity star at the top of the window.